
If you want to improve your home's air quality and HVAC efficiency, addressing air duct cleaning yourself can be a rewarding project. You'll need to gather a few essential tools and follow a systematic approach to guarantee every step is effective. From turning off your HVAC system to inspecting for mold and pests, each task plays an important role. But what if you miss a significant step or overlook a hidden problem? Understanding these 10 DIY tips can help you avoid common pitfalls and achieve the best results.
Key Takeaways
- Gather necessary tools such as a high-powered vacuum, duct cleaning brushes, and protective gear to ensure an effective and safe cleaning process.
- Turn off your HVAC system before cleaning to prevent accidental activation and reduce dust circulation during the process.
- Remove vent covers and clean them with a mild detergent solution, inspecting for dust buildup regularly based on their material.
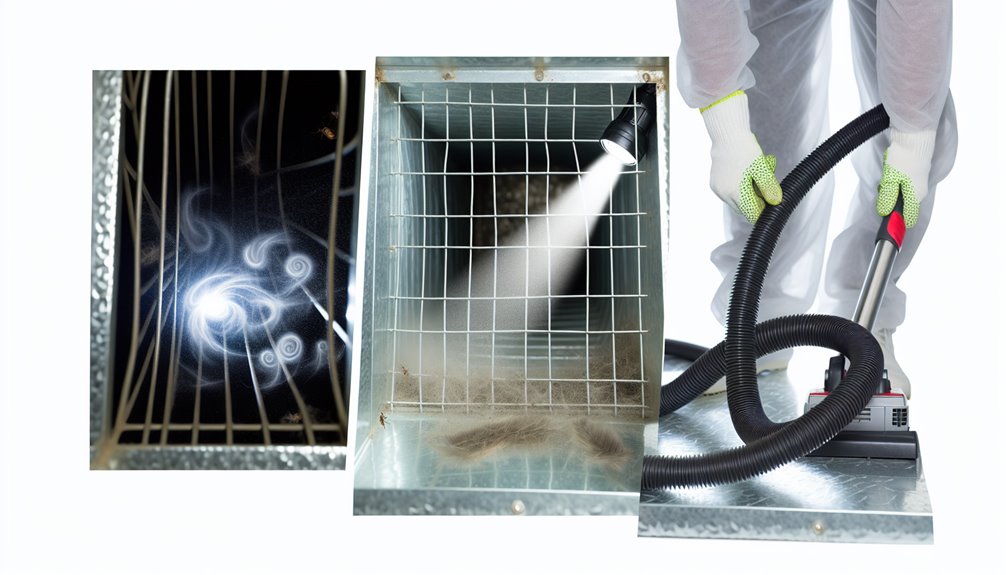
- Use a vacuum cleaner with appropriate attachments to thoroughly remove dust and debris from ducts, working systematically from the farthest point back to the vent.
- Inspect ducts for mold, mildew, or pest infestations, addressing any issues promptly to maintain a healthy indoor environment.
Gather Necessary Tools

Before diving into air duct cleaning, you'll need to gather the right tools for the job. Having the proper duct cleaning supplies is vital to guarantee an effective and safe cleaning process.
Start by acquiring a high-powered vacuum with a hose attachment; this will help you remove dust and debris efficiently. You'll also need a set of brushes specifically designed for duct cleaning. These brushes come in various sizes to fit different duct widths and shapes.
Additionally, an air compressor can be an important tool. It helps to dislodge stubborn dirt and contaminants stuck in the ductwork.
Don't forget to have a flashlight on hand, as illuminating dark spaces within your ducts will make your job easier. A pair of protective gloves and a mask will also protect you from inhaling dust and allergens released during cleaning.
Lastly, consider using a camera or inspection tool to assess the condition of your ducts before and after cleaning.
With these important tools in your arsenal, you're well-equipped to tackle the task of air duct cleaning effectively.
Turn Off Your HVAC System
Before you start cleaning your air ducts, it's essential to turn off your HVAC system.
This not merely guarantees your safety while working but also prevents any potential damage to the system and improves energy efficiency.
Safety First
To guarantee your safety while cleaning your air ducts, it's crucial to turn off your HVAC system first. This prevents any accidental activation of the system while you're working, guaranteeing ventilation safety in your environment. You'll want to wear proper protective gear, such as gloves and a mask, to shield yourself from dust and debris.
Here's a quick reference guide to enhance your safety during the cleaning process:
| Step | Action | Purpose |
|---|---|---|
| 1. Turn Off System | Switch off HVAC unit | Prevents accidental startup |
| 2. Wear Gear | Use gloves and masks | Protects against dust |
| 3. Ventilate | Open windows or doors | Improves air circulation |
| 4. Gather Tools | Have cleaning tools ready | Guarantees efficient workflow |
| 5. Inspect Ducts | Check for hazards | Identifies potential risks |
Prevent Damage
Ensuring your HVAC system is turned off not just safeguards your safety but also prevents potential damage during the cleaning process.
When the system is active, any disturbances from cleaning tools can lead to debris being sucked into the system, causing clogs or even damaging essential components.
Before you start your DIY air duct cleaning, make it a standard practice as part of your preventive maintenance routine to switch off the HVAC unit.
Conducting a damage assessment of the ducts before cleaning is vital.
Look for signs of wear, such as cracks or loose connections, which could worsen when the system is running.
If you notice any issues, address them before proceeding with the cleaning.
Energy Efficiency
Turning off your HVAC system during air duct cleaning can greatly enhance energy efficiency. When you shut down the system, you prevent dust and debris from circulating back into your living space. This not only enhances the cleanliness of your home but also guarantees that your HVAC system operates more effectively once you restart it.
By cleaning the ducts while the system is off, you allow for a thorough removal of contaminants without the added strain on your system. This leads to significant energy savings, as a clean air duct system requires less energy to maintain peak airflow.
When your HVAC system doesn't have to work as hard, you also experience cost reduction on your energy bills.
Additionally, a well-maintained duct system can prolong the lifespan of your HVAC unit, reducing future repair costs. Regularly turning off your HVAC during duct cleaning guarantees that you maintain a high level of efficiency and performance.
Remove Vent Covers

How do you start the air duct cleaning process? The first step is to remove the vent covers. This is essential for accessing the ducts and ensuring thorough cleaning. Depending on the vent cover materials—like metal, plastic, or wood—your approach may vary. Most covers are secured with screws or clips, so have the right tools ready.
Here's a quick overview of common vent cover materials and their cleaning frequency:
| Vent Cover Material | Recommended Cleaning Frequency |
|---|---|
| Metal | Every 6 months |
| Plastic | Every 6-12 months |
| Wood | Every 12 months |
| Decorative | Every 6-12 months |
After removing the covers, inspect for dust and debris buildup. If they're particularly dirty, consider cleaning them with a mild detergent solution. This not only prepares them for reinstallation but also maintains airflow efficiency. Keep in mind that regular cleaning frequency contributes to overall air quality and system performance, so plan accordingly. Removing the vent covers is a straightforward yet essential step in your air duct cleaning journey.
Use a Vacuum Cleaner
Once you've removed the vent covers, it's time to tackle the ducts using a vacuum cleaner. Start by verifying your vacuum cleaner is equipped with the appropriate attachments and settings to maximize efficiency. A powerful vacuum with adjustable settings will help you capture more dust and debris.
Here are some essential tips for using your vacuum:
- Select the Right Attachment Types: Use attachments like a crevice tool for tight spaces and a brush attachment to agitate dirt.
- Adjust Vacuum Settings: Set your vacuum to the highest suction setting for maximum effectiveness, especially in larger ducts.
- Work Systematically: Move methodically through each duct section, vacuuming from the farthest end back towards the vent.
As you clean, be cautious not to damage the ductwork. Avoid using excessively high suction in fragile areas.
Regularly check the vacuum for clogs or full bags, as these can reduce performance. By using the right equipment and techniques, you'll verify your air ducts are thoroughly cleaned, promoting better air quality and efficiency in your home.
Clean Ducts With a Brush

To effectively clean your air ducts with a brush, start by choosing a brush specifically designed for duct cleaning, as this guarantees you reach all areas without causing damage.
Next, use a proper cleaning technique by inserting the brush into the duct and rotating it to dislodge debris.
This method will help maintain airflow and improve your system's efficiency.
Choose the Right Brush
Selecting the right brush is essential for effective air duct cleaning, as the wrong tool can cause more harm than good. You need to evaluate various brush types and the cleaning materials used to guarantee superior results. Different brushes are designed for specific tasks, so choosing wisely will help you avoid damaging your ducts.
Here are three brush types to evaluate:
- Rotary Brushes: Ideal for larger ducts, these brushes rotate to remove stubborn debris effectively.
- Flexible Brushes: These are great for maneuvering bends and turns within your air ducts, guaranteeing thorough cleaning.
- Handheld Brushes: Perfect for smaller ducts or tight spaces, they allow for precise cleaning in hard-to-reach areas.
When selecting a brush, also verify that the bristles are made from non-abrasive materials to prevent scratching the duct surfaces.
Additionally, assess the size of the brush to match your duct dimensions. Using the right brush enhances cleaning efficiency and also prolongs the life of your air ducts, guaranteeing better air quality in your home.
Choose wisely, and your DIY air duct cleaning will be a success!
Proper Cleaning Technique
Using the right brush sets the stage for effective cleaning, but applying proper technique is key to achieving the best results. Start by determining the cleaning frequency based on your duct materials. For instance, flexible ducts may require different care than metal ones.
When cleaning, follow these steps:
- Insert the brush into the duct and push it to the far end.
- Scrub gently but firmly to dislodge debris.
- Pull the brush back, allowing any loosened particles to come with it.
- Repeat as necessary until the ducts are clean.
Here's a simple guide to help you understand how different materials affect your cleaning technique:
| Duct Material | Recommended Brush Type | Cleaning Frequency |
|---|---|---|
| Flexible Ducts | Soft-bristle brush | Every 2-3 years |
| Metal Ducts | Stiff-bristle brush | Every 3-5 years |
| PVC Ducts | Soft-bristle brush | Every 2-3 years |
| Fiberglass Ducts | Soft-bristle brush | Every year |
| Insulated Ducts | No brush; vacuum only | Every 2 years |
Inspect for Mold and Mildew
When you take on the task of inspecting your air ducts, one of the most crucial steps is checking for mold and mildew. These fungi can greatly affect your indoor air quality and lead to health issues.
To effectively inspect your ducts, follow these steps:
- Visual Inspection: Look for any visible signs of mold or mildew, often appearing as dark spots or patches.
- Smell Test: Pay attention to musty odors, which can indicate mold growth even if it isn't visible.
- Moisture Check: Use a moisture meter to identify damp areas, as moisture is a key factor in mold development.
If you find mold, it's important to address it promptly.
For mold prevention, maintain low humidity levels within your home and guarantee proper ventilation in your ducts.
If you encounter considerable mildew, consider using a mildew treatment solution specifically designed for HVAC systems.
Remember, proper cleaning techniques and regular inspections can help you avoid these issues before they escalate.
Check for Pest Infestation
As you clean your air ducts, it's essential to check for pest infestations that can compromise air quality.
Look for common pests like rodents and insects, and be aware of signs such as droppings, nests, or unusual odors.
Identifying these issues early can help you maintain a healthier environment in your home.
Identify Common Pests
A thorough inspection of your air ducts can reveal signs of pest infestation that may compromise air quality and overall health. Identifying common pests and understanding their behavior is vital for effective pest prevention.
Various pests can infiltrate your ducts, causing not just contamination but also potential damage.
Here are some common pests to look for:
- Rodents: Mice and rats often seek shelter in air ducts, leaving droppings and urine that can pollute your air.
- Insects: Cockroaches and ants can invade ducts, bringing allergens and pathogens, impacting your indoor environment.
- Birds: Nesting materials from birds can obstruct airflow, leading to potential blockages and increased risk of fire hazards.
Being vigilant about pest behavior will help you identify and address any infestations early. Regular inspections and maintenance of your air ducts can prevent these pests from making your home their habitat.
When you notice any signs of pests, take immediate action to maintain a healthy indoor atmosphere. Prioritizing pest prevention is essential to ensuring your air quality remains uncompromised.
Signs of Infestation
Identifying signs of infestation in your air ducts is vital for maintaining a healthy indoor environment.
Start by checking for pest droppings, which can often be a clear indicator of rodents or insects residing in your ducts. Look for small, dark pellets, often found near the vents or duct openings. These droppings not just signal a pest issue but can also pose health risks through allergens and pathogens.
Next, listen for unusual noises emanating from your ductwork. Scratching, scurrying, or chirping sounds may indicate that pests are moving around within the ducts. If these sounds become frequent, it's imperative to investigate further.
Additionally, monitor for any foul odors, which can stem from decaying pests or their waste. If you notice a musty or unpleasant smell, it's time to take action.
Finally, inspect your air filters and vents for any signs of nesting materials, such as shredded paper, fabric, or insulation, which suggest that pests have made your ducts their home.
Addressing these signs promptly can help prevent further infestation and guarantee the air quality in your home remains safe and clean.
Seal Ducts Properly
Properly sealing your ducts is essential for maintaining an efficient HVAC system and improving indoor air quality.
When your ducts are sealed correctly, you'll experience significant duct sealing benefits, such as reduced energy costs and minimized dust and allergens circulating in your home.
To achieve ideal results, you'll need to choose the right duct sealing materials, which may include mastic sealants, foil tape, or specialized duct sealing products.
Here are some key steps to guarantee effective duct sealing:
- Inspect your ducts: Look for visible gaps, leaks, or holes that could compromise airflow.
- Choose appropriate materials: Use mastic or foil tape for sealing, as these materials provide a durable and airtight seal.
- Test for leaks: After sealing, conduct a pressure test to confirm that your ducts are sealed correctly and functioning efficiently.
Replace Air Filters Regularly
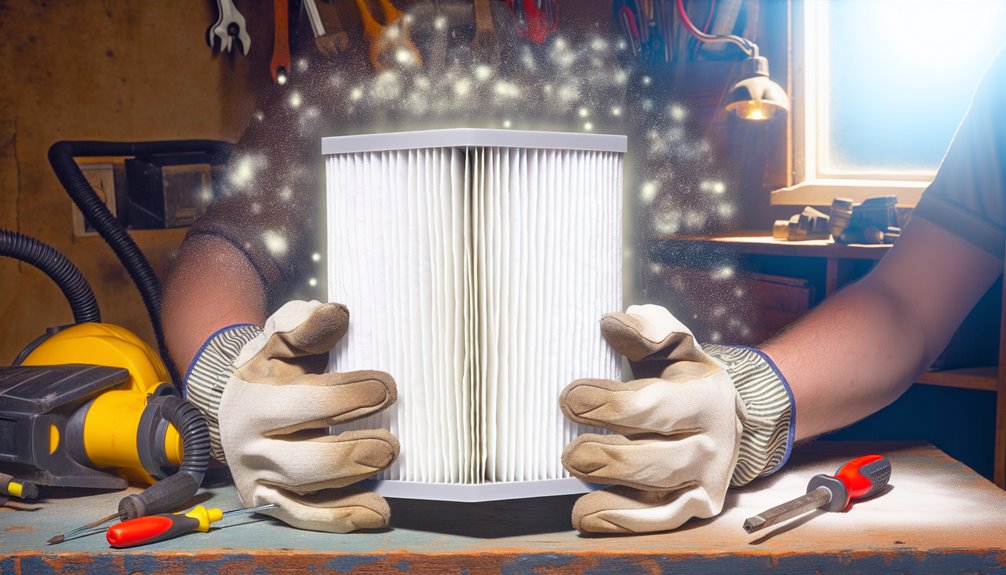
Replacing air filters regularly is essential for maintaining ideal HVAC performance and ensuring good indoor air quality. Clean filters allow your system to function efficiently, reducing energy consumption and extending the lifespan of your equipment. You should familiarize yourself with different filter types, such as HEPA, pleated, and fiberglass filters, to choose the best option for your needs.
To help you keep track of filter maintenance, consider the following table:
| Filter Type | Lifespan | Maintenance Tip |
|---|---|---|
| HEPA | 6-12 months | Check every 6 months for dust |
| Pleated | 3-6 months | Replace every 3 months |
| Fiberglass | 1-3 months | Inspect monthly, replace as needed |
| Washable | 1-3 years | Clean monthly to maintain efficiency |
| Carbon | 1-2 months | Replace every 1-2 months |
Schedule Routine Cleanings
Even with regular air filter replacements, dust and debris can still accumulate in your air ducts over time, impacting airflow and air quality.
Scheduling routine cleanings is crucial to maintain peak performance and guarantee a healthy environment. The best cleaning frequency typically depends on various factors, including your location, the presence of pets, and your home's overall dust levels.
Consider the following seasonal maintenance tips:
- Every 1-2 Years: Schedule professional cleanings to thoroughly remove dust, allergens, and debris.
- Quarterly Inspections: Check your ducts for signs of mold, pests, or unusual buildup, especially during seasonal changes.
- Post-Renovation Cleaning: If you've recently remodeled or renovated your home, clean your ducts to remove construction dust and debris.
Frequently Asked Questions
How Often Should I Clean My Air Ducts?
You should clean your air ducts every three to five years, but frequency recommendations can vary based on your environment.
If you have pets, allergies, or live in a dusty area, consider seasonal cleaning. This helps maintain air quality and efficiency in your HVAC system.
Regular inspections can also alert you to any buildup that may require more frequent attention. Staying proactive guarantees a healthier living space and ideal system performance.
Can I Use a Regular Vacuum for Duct Cleaning?
You can use a regular vacuum for duct cleaning, but it's not the most effective choice.
Standard vacuum types often lack the necessary suction power to remove deep-seated debris.
For thorough duct maintenance, consider using a vacuum with specialized attachments designed for duct cleaning.
This guarantees you effectively dislodge and extract dust and allergens, promoting better airflow and maintaining your HVAC system's efficiency.
Regular cleaning will enhance your indoor air quality considerably.
What Are the Signs of Dirty Air Ducts?
You can identify dirty air ducts by looking for dust buildup around vent openings and noticing airflow issues in your home.
If you see dust accumulating or experience reduced airflow from your vents, it's a clear sign your ducts may need cleaning.
Additionally, if you frequently sneeze or have allergy symptoms indoors, it might indicate that your air ducts are circulating dust and debris, impacting your indoor air quality.
Is Professional Duct Cleaning Necessary?
Did you know that 40% of your home's energy usage can be attributed to heating and cooling?
While DIY techniques can help maintain your air ducts, professional duct cleaning can provide significant cost benefits, especially if your system hasn't been cleaned in years.
Professionals have specialized tools that effectively remove deep-set debris, improving air quality and system efficiency.
If you're experiencing issues, investing in professional cleaning might be necessary for peak performance.
What Health Issues Are Linked to Dirty Air Ducts?
Dirty air ducts can lead to several health issues.
When dust, mold, and other contaminants accumulate, they can become airborne, causing respiratory issues like asthma or chronic bronchitis.
Additionally, these pollutants serve as allergy triggers, exacerbating symptoms in sensitive individuals.
If you're experiencing frequent sneezing, coughing, or difficulty breathing, it might be time to assess your air ducts.
Keeping them clean can greatly improve your indoor air quality and health.
Conclusion
By following these DIY tips for air duct cleaning, you can greatly improve your home's air quality and HVAC efficiency. For instance, consider a family who regularly cleaned their ducts and replaced filters; they noticed a marked decrease in allergy symptoms and lower energy bills. This simple maintenance routine not just enhanced their comfort but also extended the lifespan of their HVAC system. Prioritize your air duct care, and you'll reap the benefits of cleaner air and a more efficient home.